
Starting a new JavaFX project
jDeploy provides both Maven and Gradle project templates

With jDeploy’s new desktop app comes some shiny new project templates to help get you started on the right foot. All project templates come pre-wired for manual deployment (e.g. you press “Publish” and it uploads directly to GitHub releases or npm), and automated deployment via GitHub workflows (e.g. when you create a new release, it adds your app bundles to the release).
There are currently 2 templates for starting JavaFX (3 if you count the FXGL template):
JavaFX Maven Starter
JavaFX Gradle Modular Starter
You could simply choose based on whether you prefer Gradle or Maven, but I strongly recommend the JavaFX Gradle Modular starter, as it provides an objectively better developer experience. I adapted this template from the easyJavaFXSetup GitHub repository created by Julien Trudet because it works so nicely out of the box.
It provides the foundation for some nice features that have become expected by users. This includes:
i18n support
User preferences, such as the ability to remember window locations.
Dark and light mode support
Vector icons.
It also gets you started with a logical class structure that follows best practices, by separating code into controllers and services.
The project is set up to use Java 21, so you’ll need to have at least JDK 21 installed in order to build it.
Getting Started
Prerequisites
JDK 21 (You can choose any distribution. I personally like Zulu JDKs).
Creating a project
Open the jDeploy desktop app, and select “Create new project”
Then, select the “JavaFX Gradle Modular Starter” template, and click “Next”.

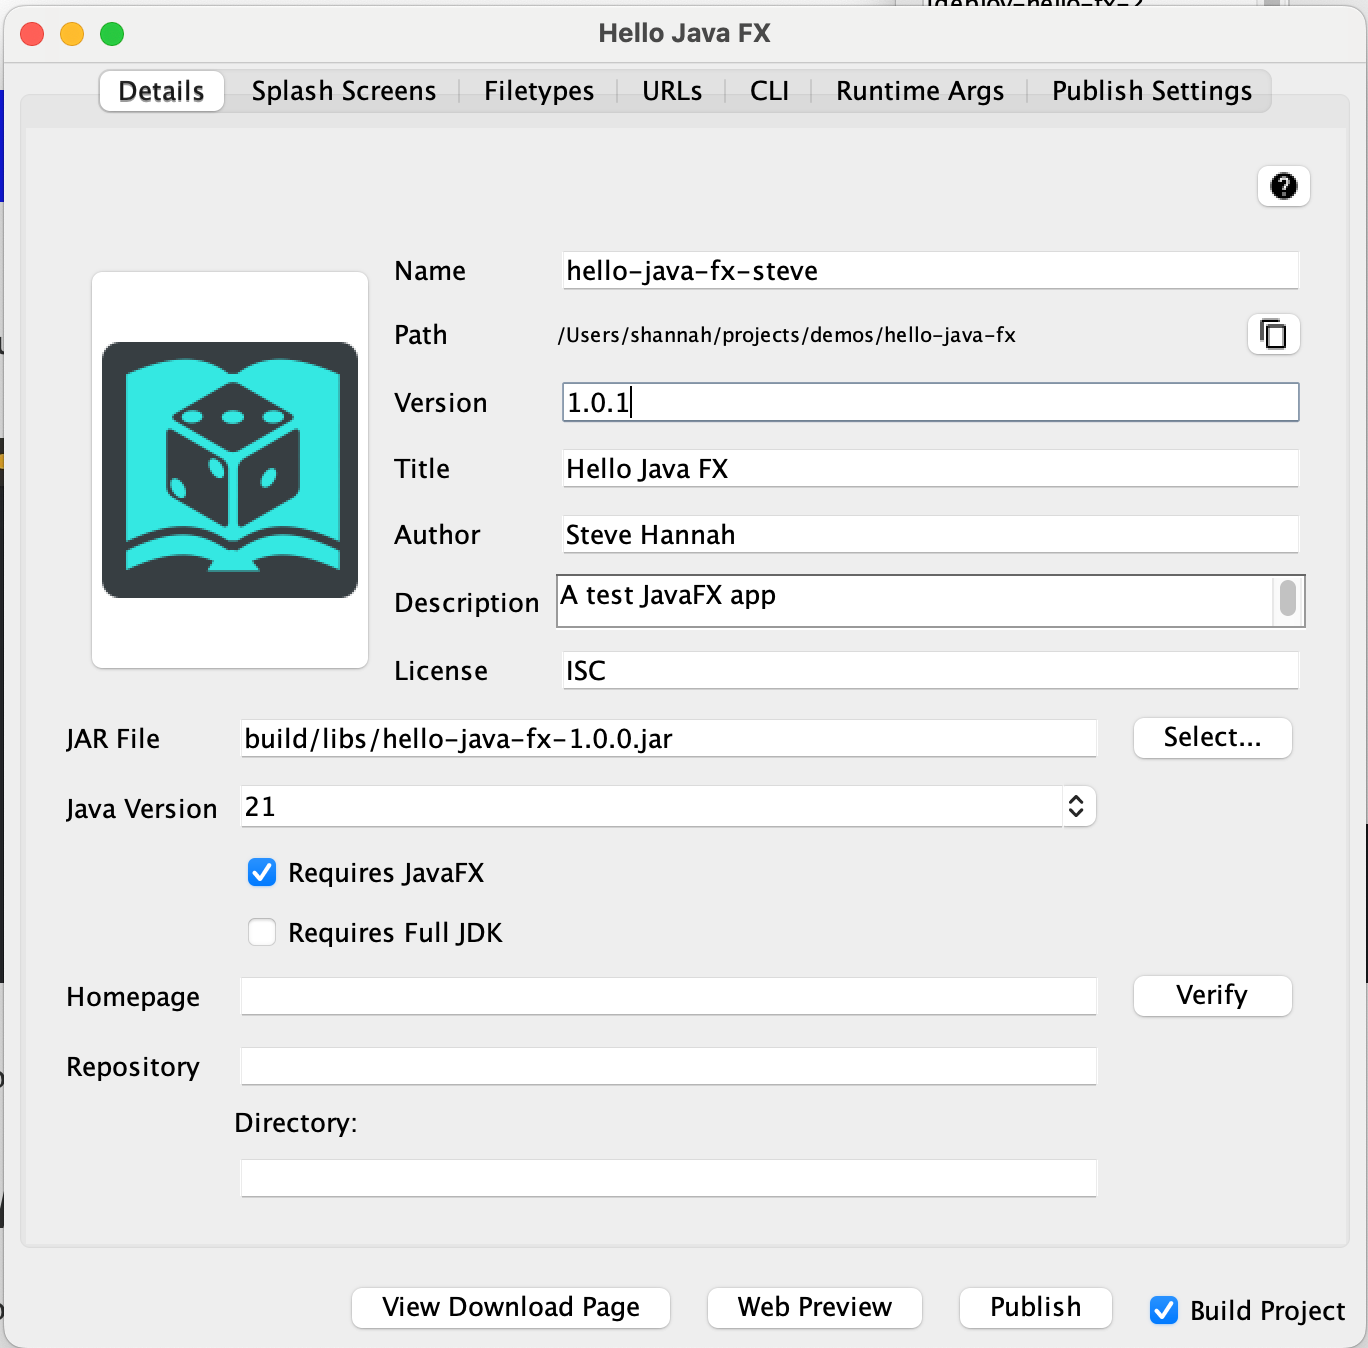
Fill in the fields in the project details, as shown below.

All of this can be changed later, but it will help you to get it right at the start.
The Application Display Name is the human-readable name for your app. It will be displayed in the start menu, or the dock, and the app icon for your finished application.
The Group ID and artifact ID will be familiar to anyone who has used Gradle or Maven before. jDeploy will use these also for setting up the base package for your project files. In the example above, the main package will be `com.example.hellojavafx`.
Publish Settings
You have two choices currently for publishing:
Both offer free accounts. Even if you already have a GitHub account, you may want to just create an npm account, as I find publishing to npm to be a little bit easier. In either case, you’ll need to create an access token for jDeploy to publish your app.
If you select “npm” as your publish target, you’ll need to enter an npm project name that is globally unique. By default it jDeploy will just use the artifact ID that you entered above, but if this is already taken in npm, you can change it later.
If you are publishing to GitHub, then you’ll need to enter the GitHub repository URL where you’ll be publishing releases to. This doesn’t need to be the same repository where your project’s source code resides. It just needs to be a public repository.
Once you’ve completed the form, press the “Finish” button.
The Project Editor
This will create your project, and display the project editor dialog as shown here:

The project editor provides you with several customization options for your desktop app. E.g. Icon, splash screen, file types and URLs that your app will open, and more.
You can open the project in your preferred IDE by selecting “File” > “Open in IDE”

But, before we do that, let’s get some instant gratification, and publish the application right now.
If you haven’t already built the project, you’ll want to check the “Build Project” button in the lower right.

With this checked, it will cause jDeploy to find an appropriate JDK and build the project as an executable Jar file before trying to publish it.
One last thing, before we can publish to npm, is we need to fill in the “Author” field. I’m also going to change the name to make it unique.

Now save it by selecting “File” > “Save”, or Ctrl-S (CMD-S on Mac).
Finally press “Publish”
jDeploy will prompt you to ensure that you really meant to publish it.

Press “Yes” to proceed.
The next prompt will ask you which npm account you want to use.
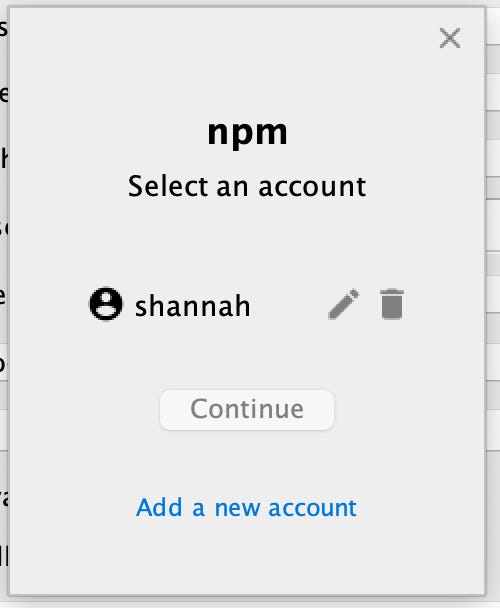
If this is your first time publishing, then you’ll need to press “Add a new account”, which will allow you to enter an account and token.

As mentioned before, you’ll need to first generate an access token for jDeploy. You can’t just use your npm username and password, unfortunately.
This token will be stored securely in your system keychain.
For details on creating a token, see the instructions in the jDeploy manual.
Once you’ve entered your account, you can select it and press “Continue”
If all goes well, you’ll see something like this:
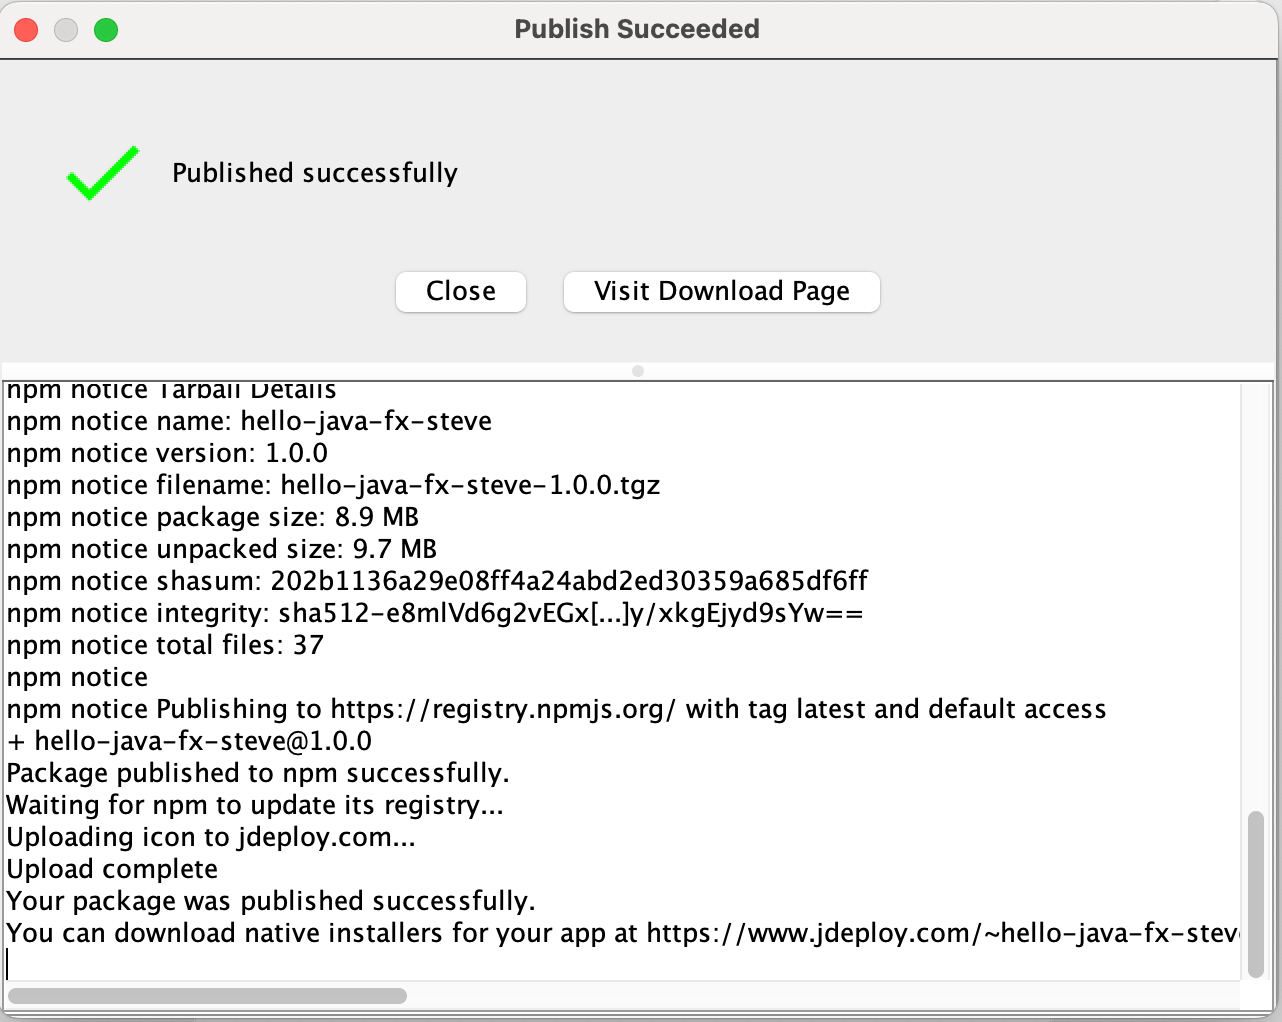
Click on “Visit Download Page” to access the download page for your application.
The URL for this particular test app is: https://www.jdeploy.com/~hello-java-fx-steve
It provides download links for Windows, Linux, and Mac as shown below:

Trying out the app
Download the appropriate link for your computer and take it for a spin.
On Mac, it will download the installer inside a tar.gz. Extract it and open the installer contained therein.

On Windows you can just open the exe installer directly from your browser.
The installer should open, and look something like this:

The splash screen is customizable. You can change that for your next release. Also note, that on Windows and Linux, you’ll have a slightly different set of checkboxes. E.g. Instead of “Add to dock”, you’ll have “Add to start menu”.
Click “Install”.
You’ll be prompted with a warning to make sure that you trust the software, as shown below:

This provides the user an opportunity to verify that this app came from someone that they trust, before proceeding to install the application.
Click “Proceed” to complete the installation.
Then you’ll see something like:
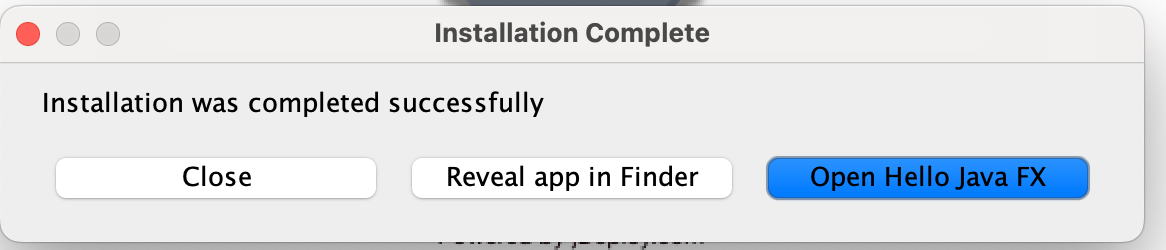
Now, let’s open the app so you can see this template.

Simple, but slick. It provides a good starting point for your application.
Opening the project in your IDE
Let’s take a brief tour of the code to see what will be involved in building this generic project into something of our own design.
An easy way to open it is from jDeploy, using the “Open in IDE” menu.
In my case, I’ll select “IntelliJ”, but the template should work well in NetBeans, Eclipse, and Visual Studio code also.
Here’s a screenshot in IntelliJ to give you an taste of the file structure.
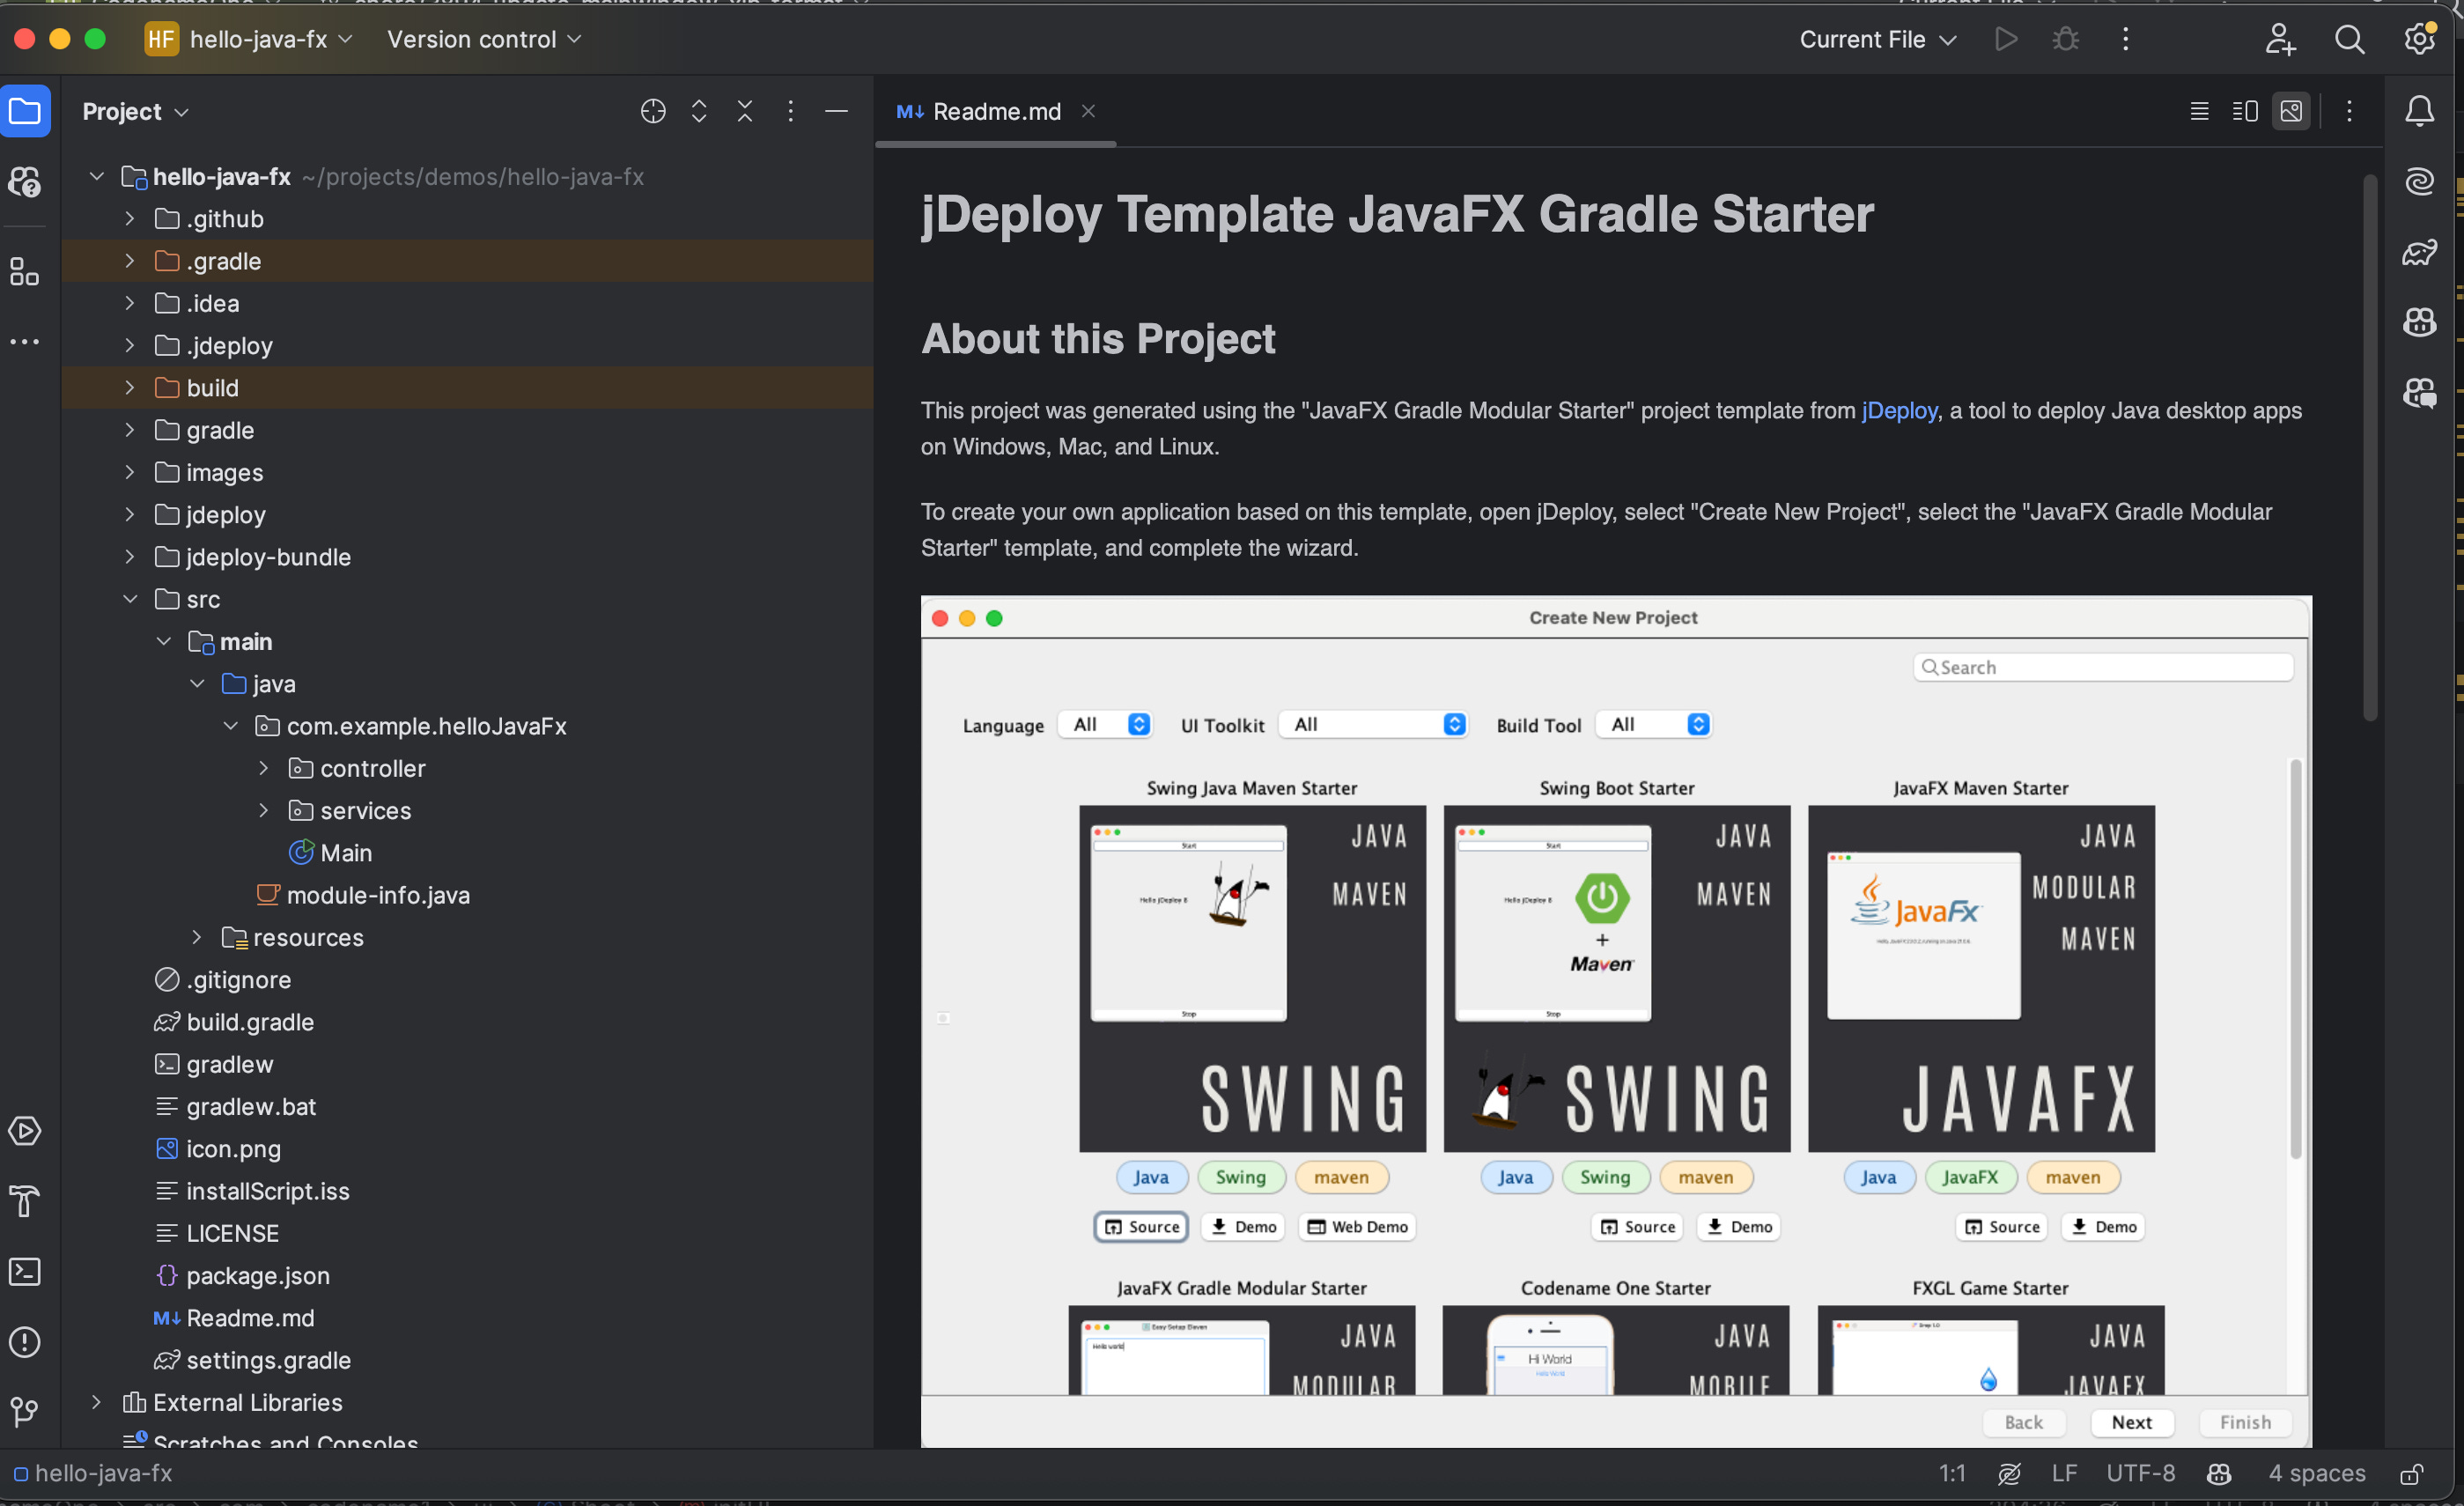
This is after having built it, so there are a few directories that were added as part of that build. This includes the “jdeploy-bundle” and “build” directories.
All of the jDeploy publish settings are stored in the “package.json” file. If you prefer to work with the JSON directly, then you are free to do that, rather than using the jDeploy GUI.
The main entry point is the `MainController` class:
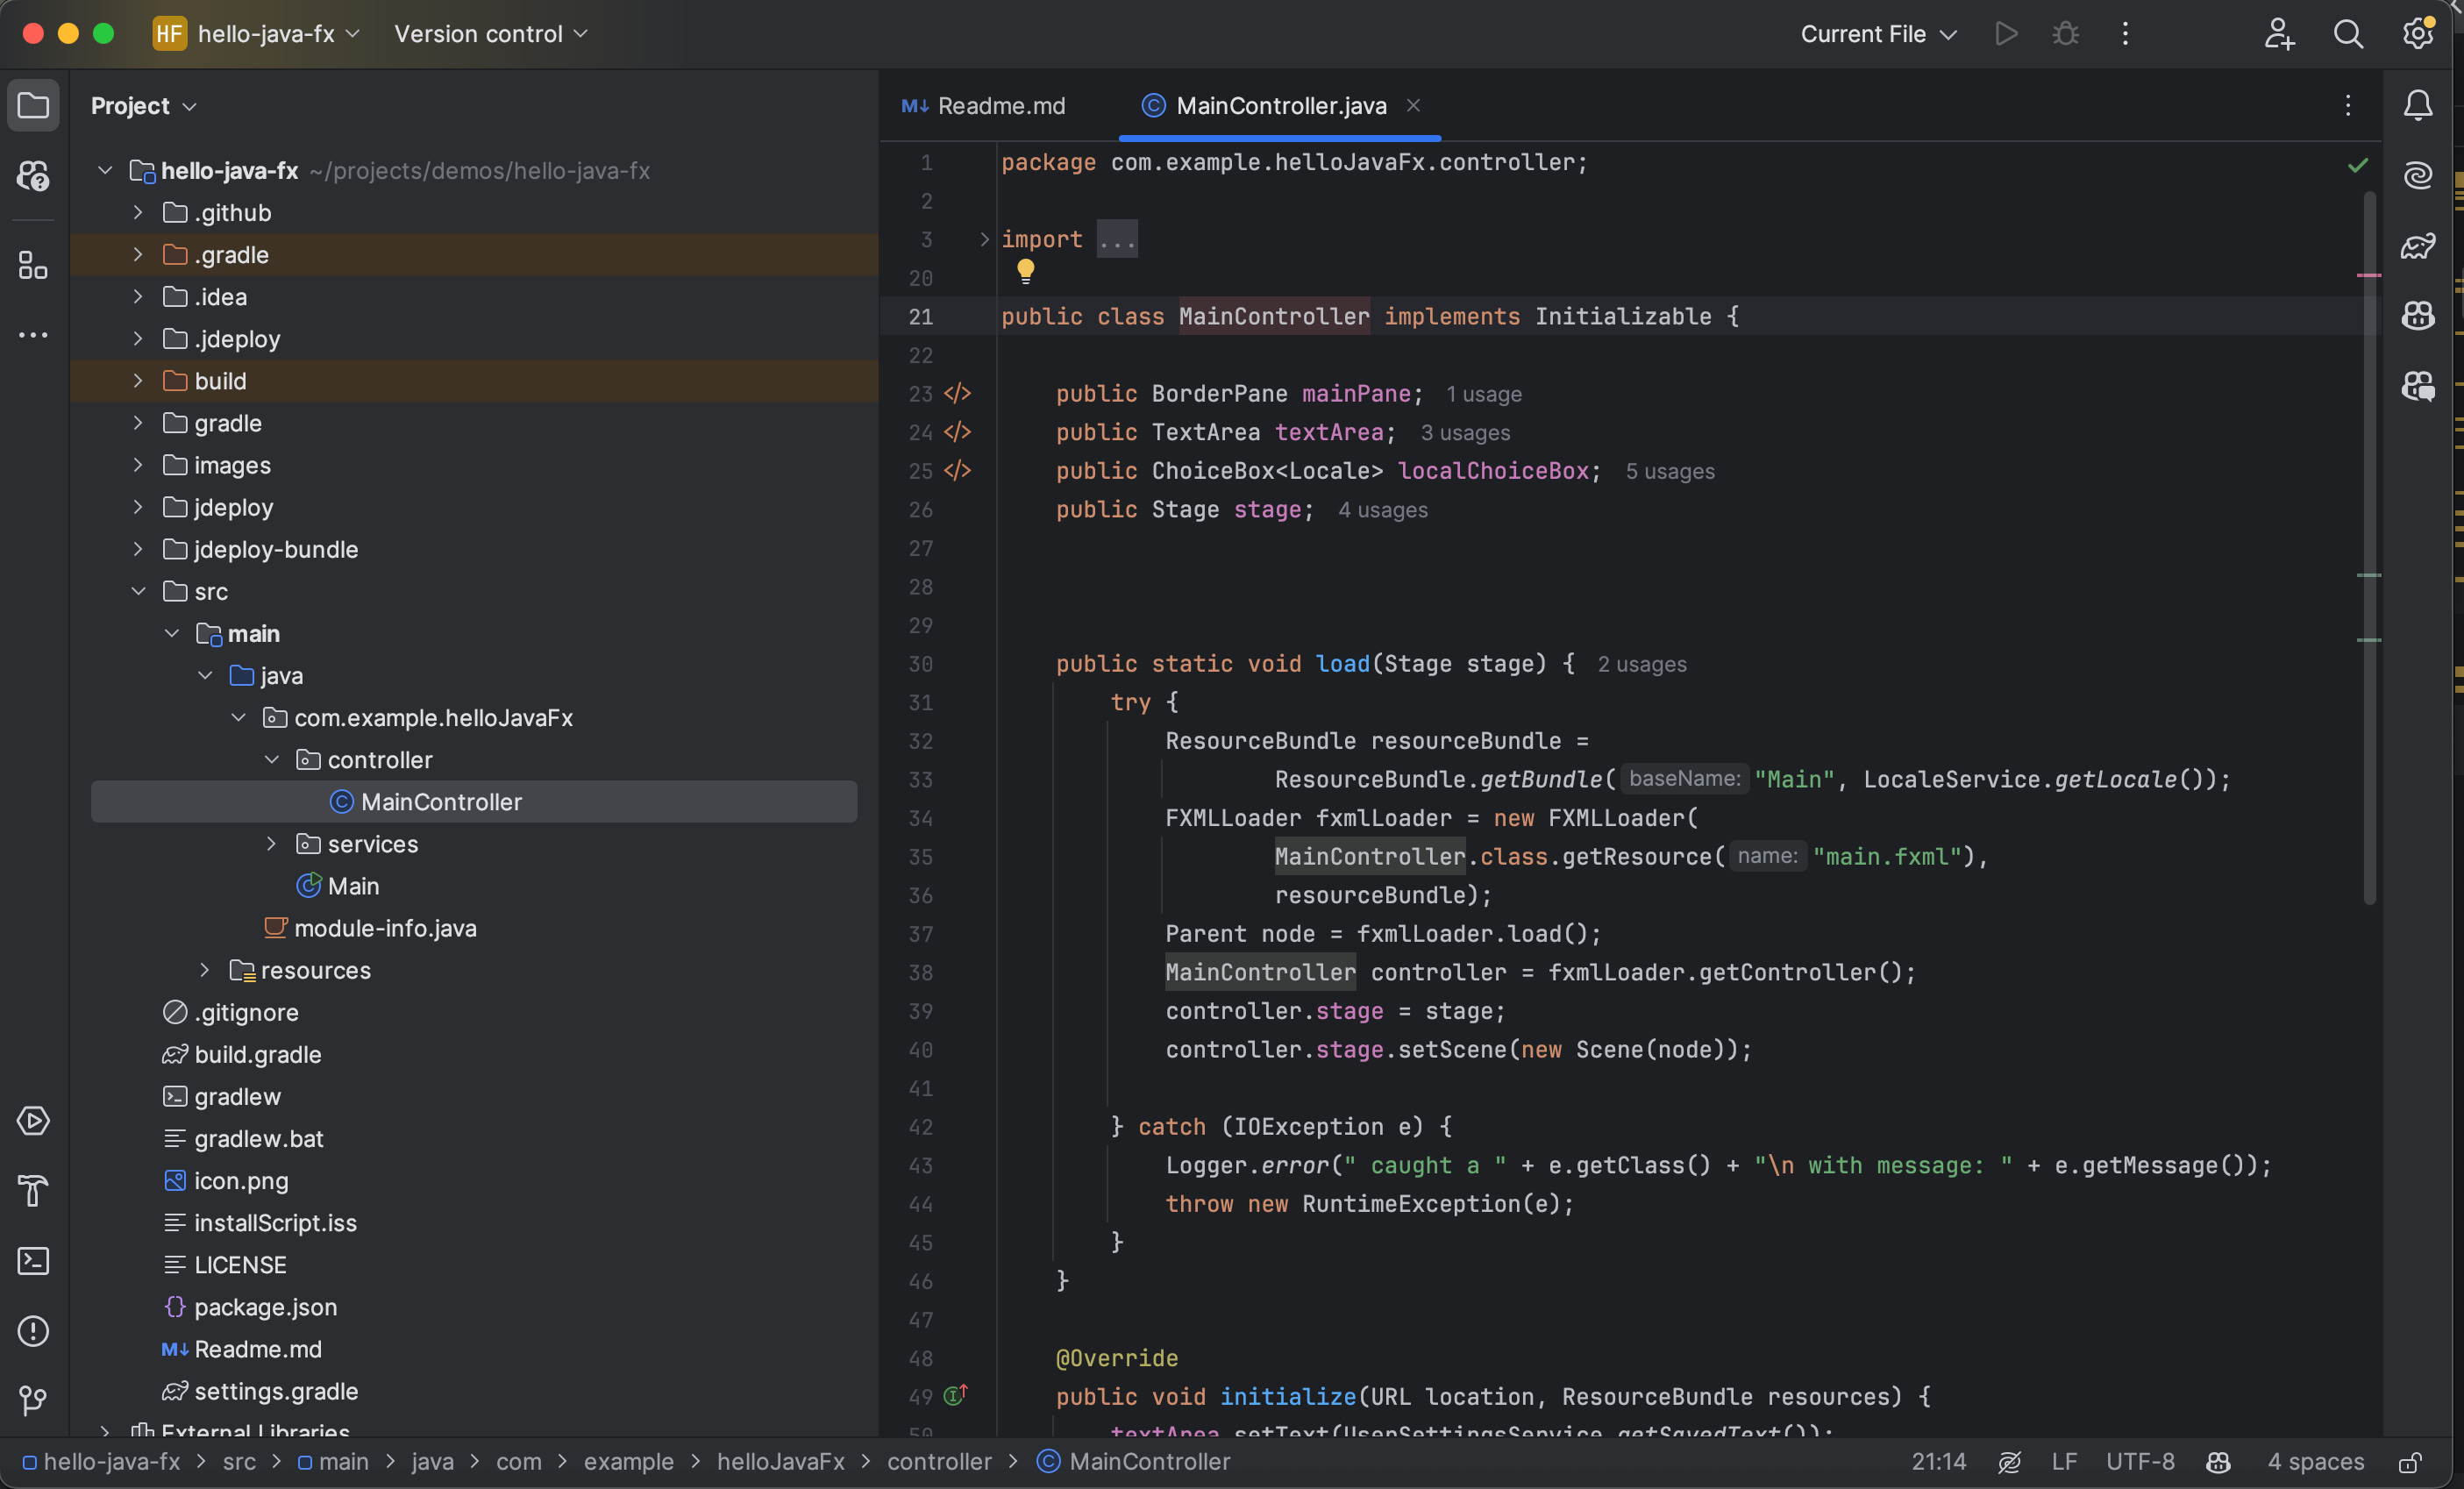
It loads the “main.fxml” file from the resources directory.
This file can be edited directly in your text editor, however, you’ll have more fun if you install SceneBuilder, the WYSIWYG UI builder for JavaFX.
Running the Project
One thing that puzzles me is why modern IDEs can’t automatically figure out how to to run a Gradle or Maven project, without me having to manually set up a run configuration. Please someone correct me on this, because it has annoyed me for over a decade now - since I started to prefer Maven over proprietary IDE project structures.
I understand the difficulty here because Maven and Gradle don’t really have a “run” command, and “running” a project may mean different things to different people.
All of the jDeploy project templates include instructions in their README on running the project from the command-line, and generally you can use that as a basis for setting up your run configuration in the IDE. For example, the JavaFX Gradle Modular template readme shows:

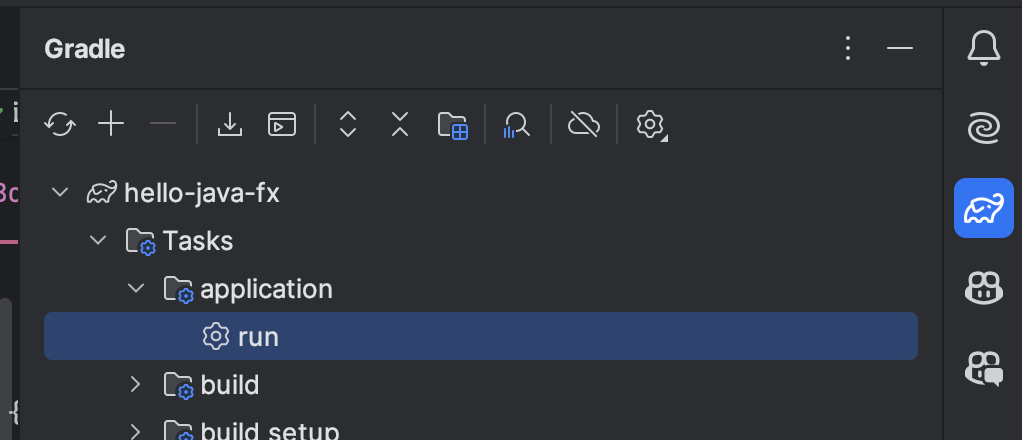
In IntelliJ, you can run the project from the “Gradle” side-menu, under Tasks > Application > run
If you don’t feel like searching for this amongst the other Gradle tasks every time, you can set up a run configuration, by selecting “Edit Configurations…” from the run configurations drop-down on the toolbar (upper right)

Then press the “+” in the upper left of the configurations dialog to add a new configuration, and select “Gradle” from the list.

In the “Run” field, just enter “run”. That’s it. Then press “OK”.

Now you should have a “run” option in your toolbar, as shown below:

You can press the “Play” icon to run your project directly, or the “Bug” icon to debug the project.
Now you’re off and running.
Building the project
To build the project, use the `buildExecutableJar` task, which can be found, in IntelliJ, in the radle sidebar under “Tasks” > “release”.
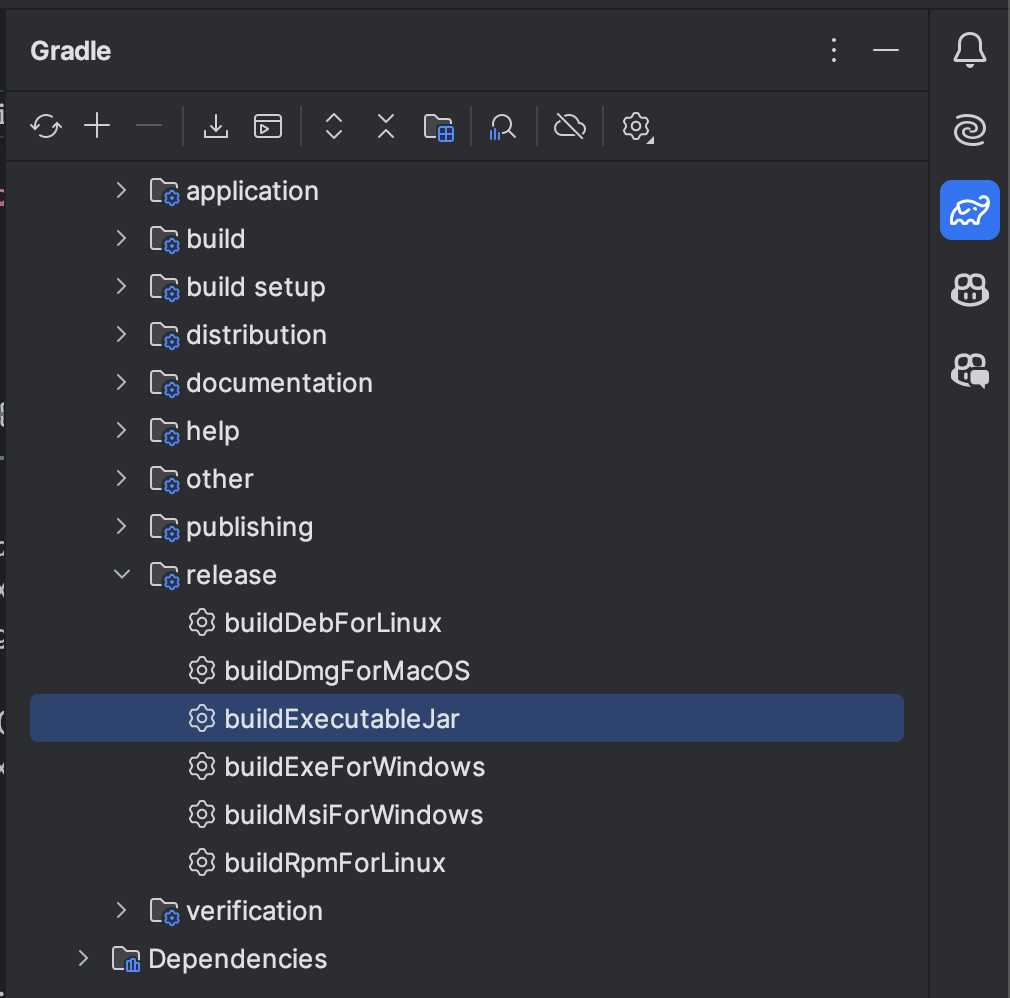
You’ll notice that there are several other build options here that look interesting, such as buildDmgForMacOS, and buildExeForWindows. These tasks were included in the original project template that I adapted, and they use jlink, jpackage, and native third party tools in order to work. Since jDeploy already publishes native bundles for all of these targets without needing any 3rd party tools, we don’t need to use these.
We use only the buildExecutableJar task, because this is the format that jDeploy needs as its “input”, to produce native bundles.
Updating your app
One of the killer features of jDeploy is auto-update. Your application will check for updates when it is launched, and seamlessly download the latest version (according to the user’s update settings) to ensure that your users are always using the latest version.
Let’s test that out right now, by changing the Window title in the app.
Open the Main_en.properties file, and change the “name” to “Hello jDeploy”, and save your changes.

Now return to the jDeploy desktop app, and change the “Version” from “1.0.0” to “1.0.1”. And save.
Now, build the project again, and run it to verify that the window title has been changed.
Since the project is already built, you can un-check the “Build Project” checkbox this time. Then press “Publish”.
Wait for the publishing to complete successfully, then close and re-open your “Hello JavaFX” app. It should automatically detect and download the new version, and will open up with the new title.

There was no need to reinstall the app. Just re-open it.
Wasn’t that easy?
Where to go from here
Now that you have a working application, you can iterate until it meets your needs. You can share the app with your users every step of the way.
This article only shows a manual release workflow, which may be enough for you, but jDeploy can also be easily integrated into your GitHub workflows so that, for example, a new version is published on every commit, or every release.
For most questions, jDeploy-related, you can check the jDeploy manual, or visit the discussion forum on GitHub.
For JavaFX questions, there are many useful resources, but the official source is the openjfx.io website.
And, I’m always looking for feedback and suggestions to make jDeploy better. Please don’t be shy with your ideas. You can either drop them here in the comments, or in the discussion forum.
Good for learning javafx